What is minikube?
Run Kubernetes locally with minikube
Kubernetes provides container orchestration software. It is a platform that automates the deployment and scaling of containerized applications and provides a solution to manage the distributed environment. Although the Kubernetes production environment runs in a cloud environment, the use of a Kubernetes cluster locally is also feasible. In this article, we will see how we can run Kubernetes locally using minikube.
Here's a list of things we will cover in this blog:
What is minikube and what are its key features?
How to install minikube on your computer?
What are some of the things you can do with minikube?
How to get started with the minikube dashboard?
What is minikube?
If you're a developer, you've probably heard of Kubernetes. It's a powerful tool for deploying and managing containers at scale. But what if you don't want to run Kubernetes clusters on a remote server? What if you want to run Kubernetes locally? That's where minikube comes in. minikube is a local Kubernetes installation that runs on your local machine. In this blog post, we will discuss what minikube is and how it can benefit your development workflow!
Kubernetes is a container management system that enables developers to deploy and manage applications at scale. Kubernetes clusters are often used in production environments, where they can handle large numbers of containers and ensure that they are running correctly. However, Kubernetes can also be used for development and testing purposes.
You can consider minikube as a single-node Kubernetes cluster that runs on your local computer. minikube is ideal for development and testing purposes, as it can be used to test Kubernetes applications without needing a large and complex Kubernetes setup.
Install minikube on your computer
Minimum requirements
2 CPUs
2 GB free memory
20 GB free disk space
Container engine or virtual machine manager like Docker, Virtual Box, KVM, Parallels, VMWare Fusion, etc
Live internet connection
minikube can be installed on Linux, macOS, and Windows.
Step 1 — Installing and Running Minikube
It is easy to install minikube on different operating systems. With minikube and Docker driver, you can use the start command which automatically creates the cluster from several Docker containers using the latest stable Kubernetes release.
Installing minikube on macOS using homebrew
To install minikube with homebrew, run the below command:

Check the minikube official website for instructions to install minikube on different platforms.
Next, install Docker with homebrew or follow the steps in this link to install Docker on Mac.
$ brew install docker --caskStart minikube with the latest Kubernetes release
Run this command to start minikube with the Docker driver.
$ minikube start --driver docker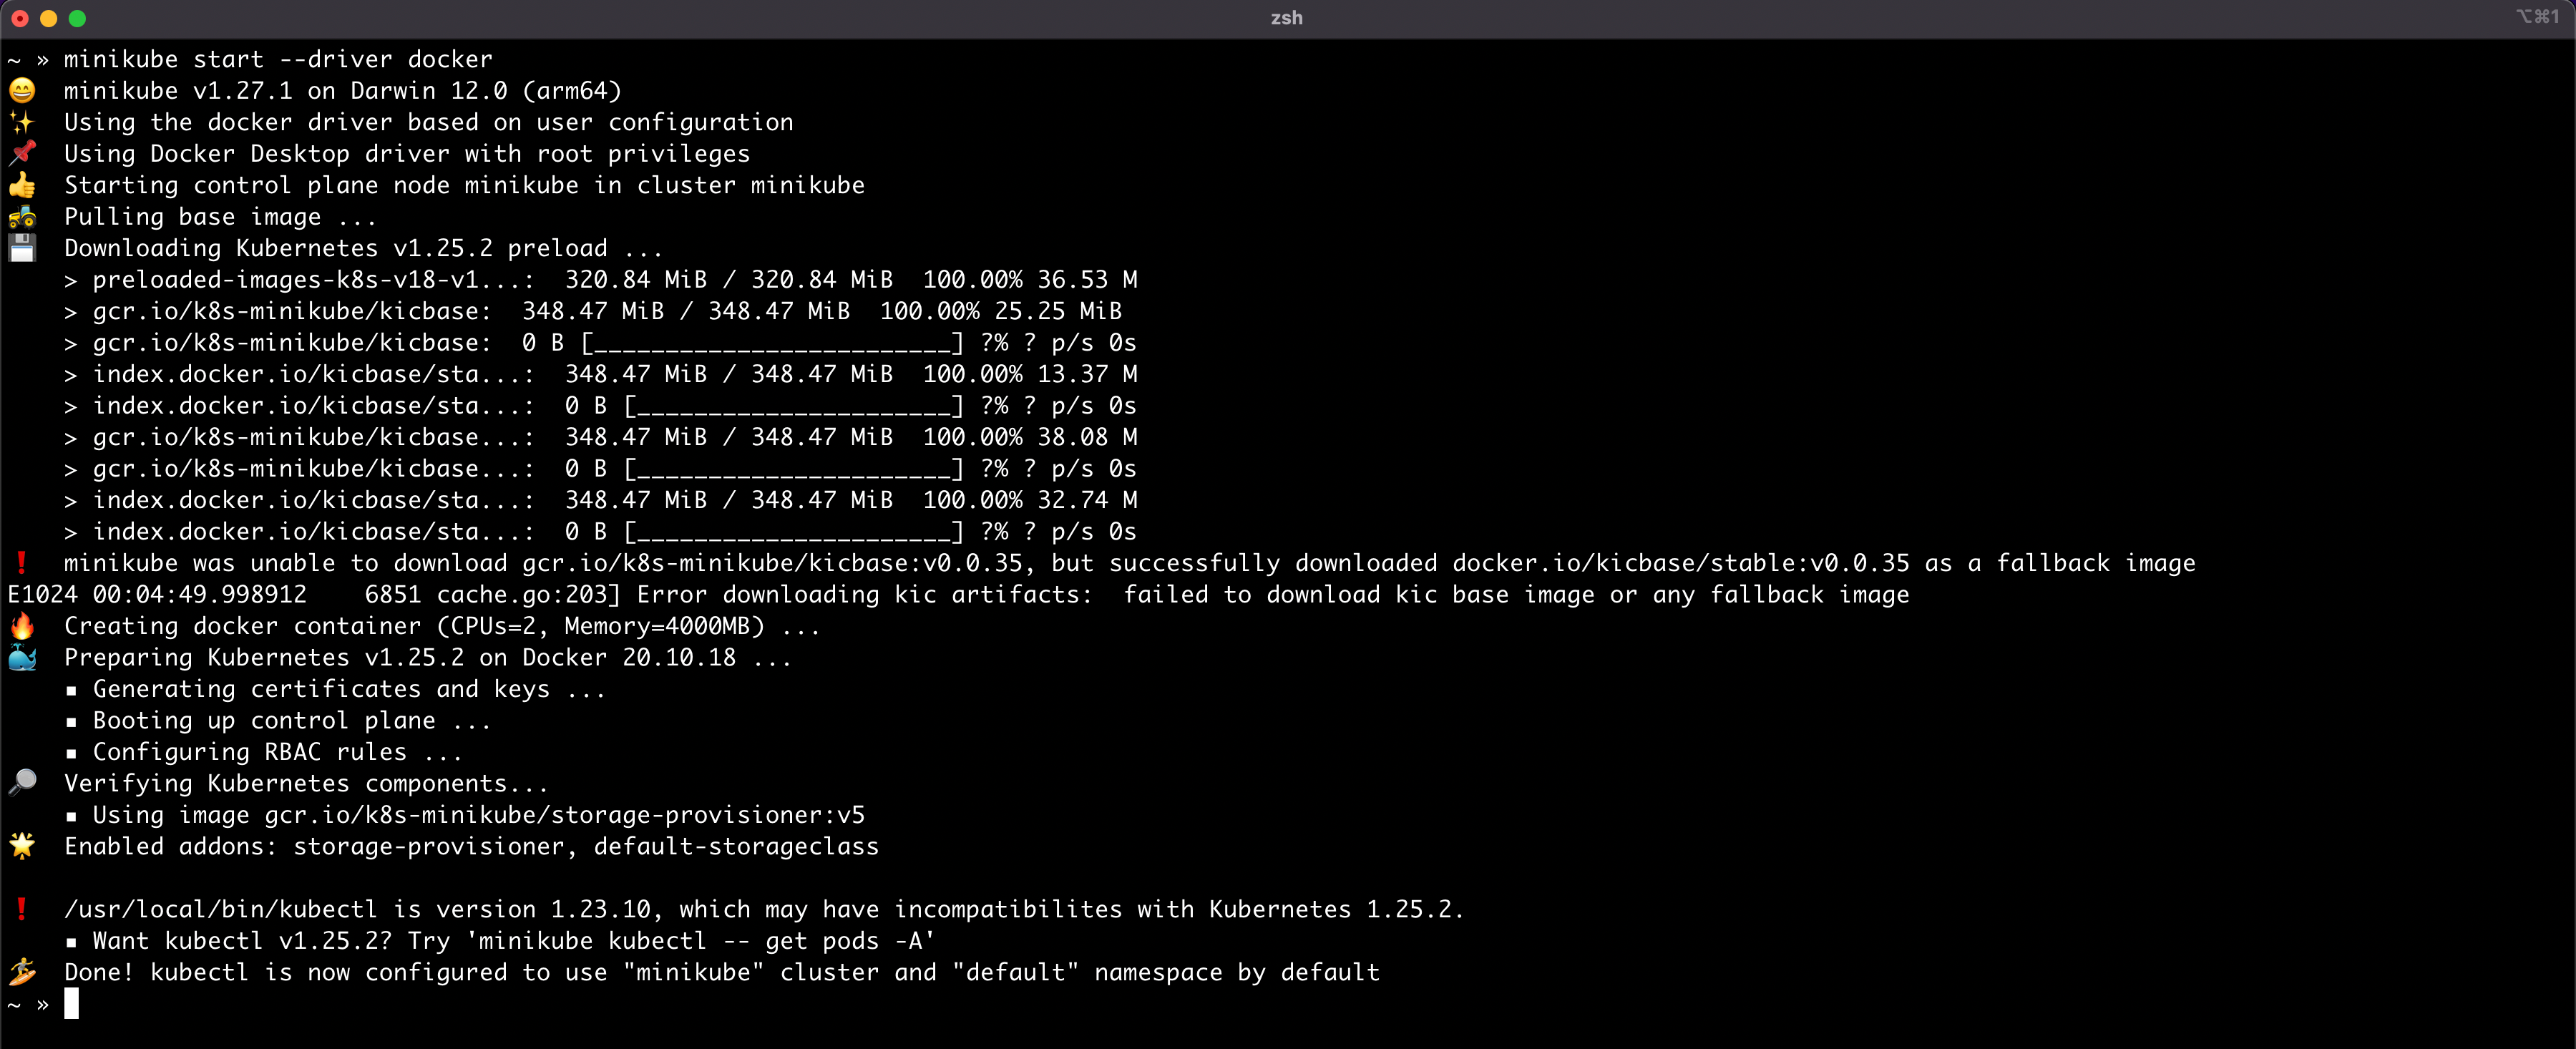
By default, minikube creates the Docker container with 2 CPUs and 2 GB memory.
We can also customize the number of CPUs, memory, and disk size.
For example, to start minikube with 4 CPUs, 4 GB memory and a 10 GB disk, use the following command.
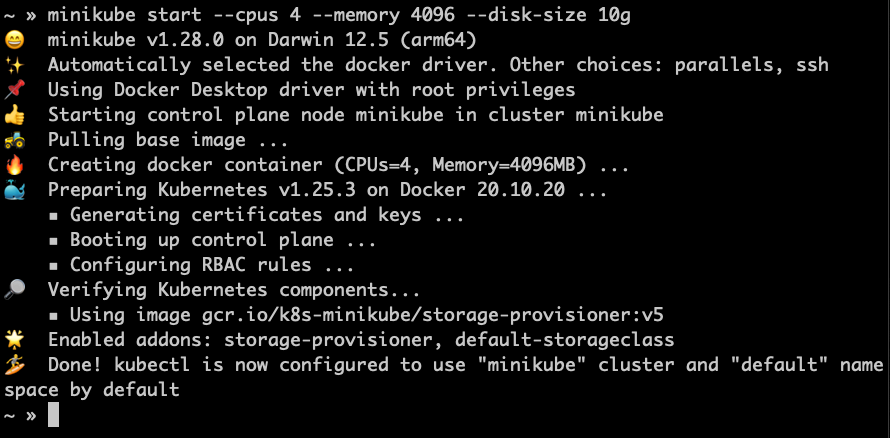
To get all the options to configure minikube use the following command.
Step 2 — Preparing the cluster for Kubernetes Dashboard
minikube has implemented Kubernetes dashboards. The Kubernetes dashboard allows the monitoring and deployment of applications manually.
Some of the minikube dashboard features require the metrics-server add-on. To install the metrics-server add-on, run the below command:
$ minikube addons enable metrics-server
Step 3 - Interact with your cluster
You can now access a shiny new cluster using Kubectl. By default minikube automatically configures a new kubectl context to access the cluster. To see the kubectl contexts, run the following command:

Step 4 - Deploy a sample Kubernetes application
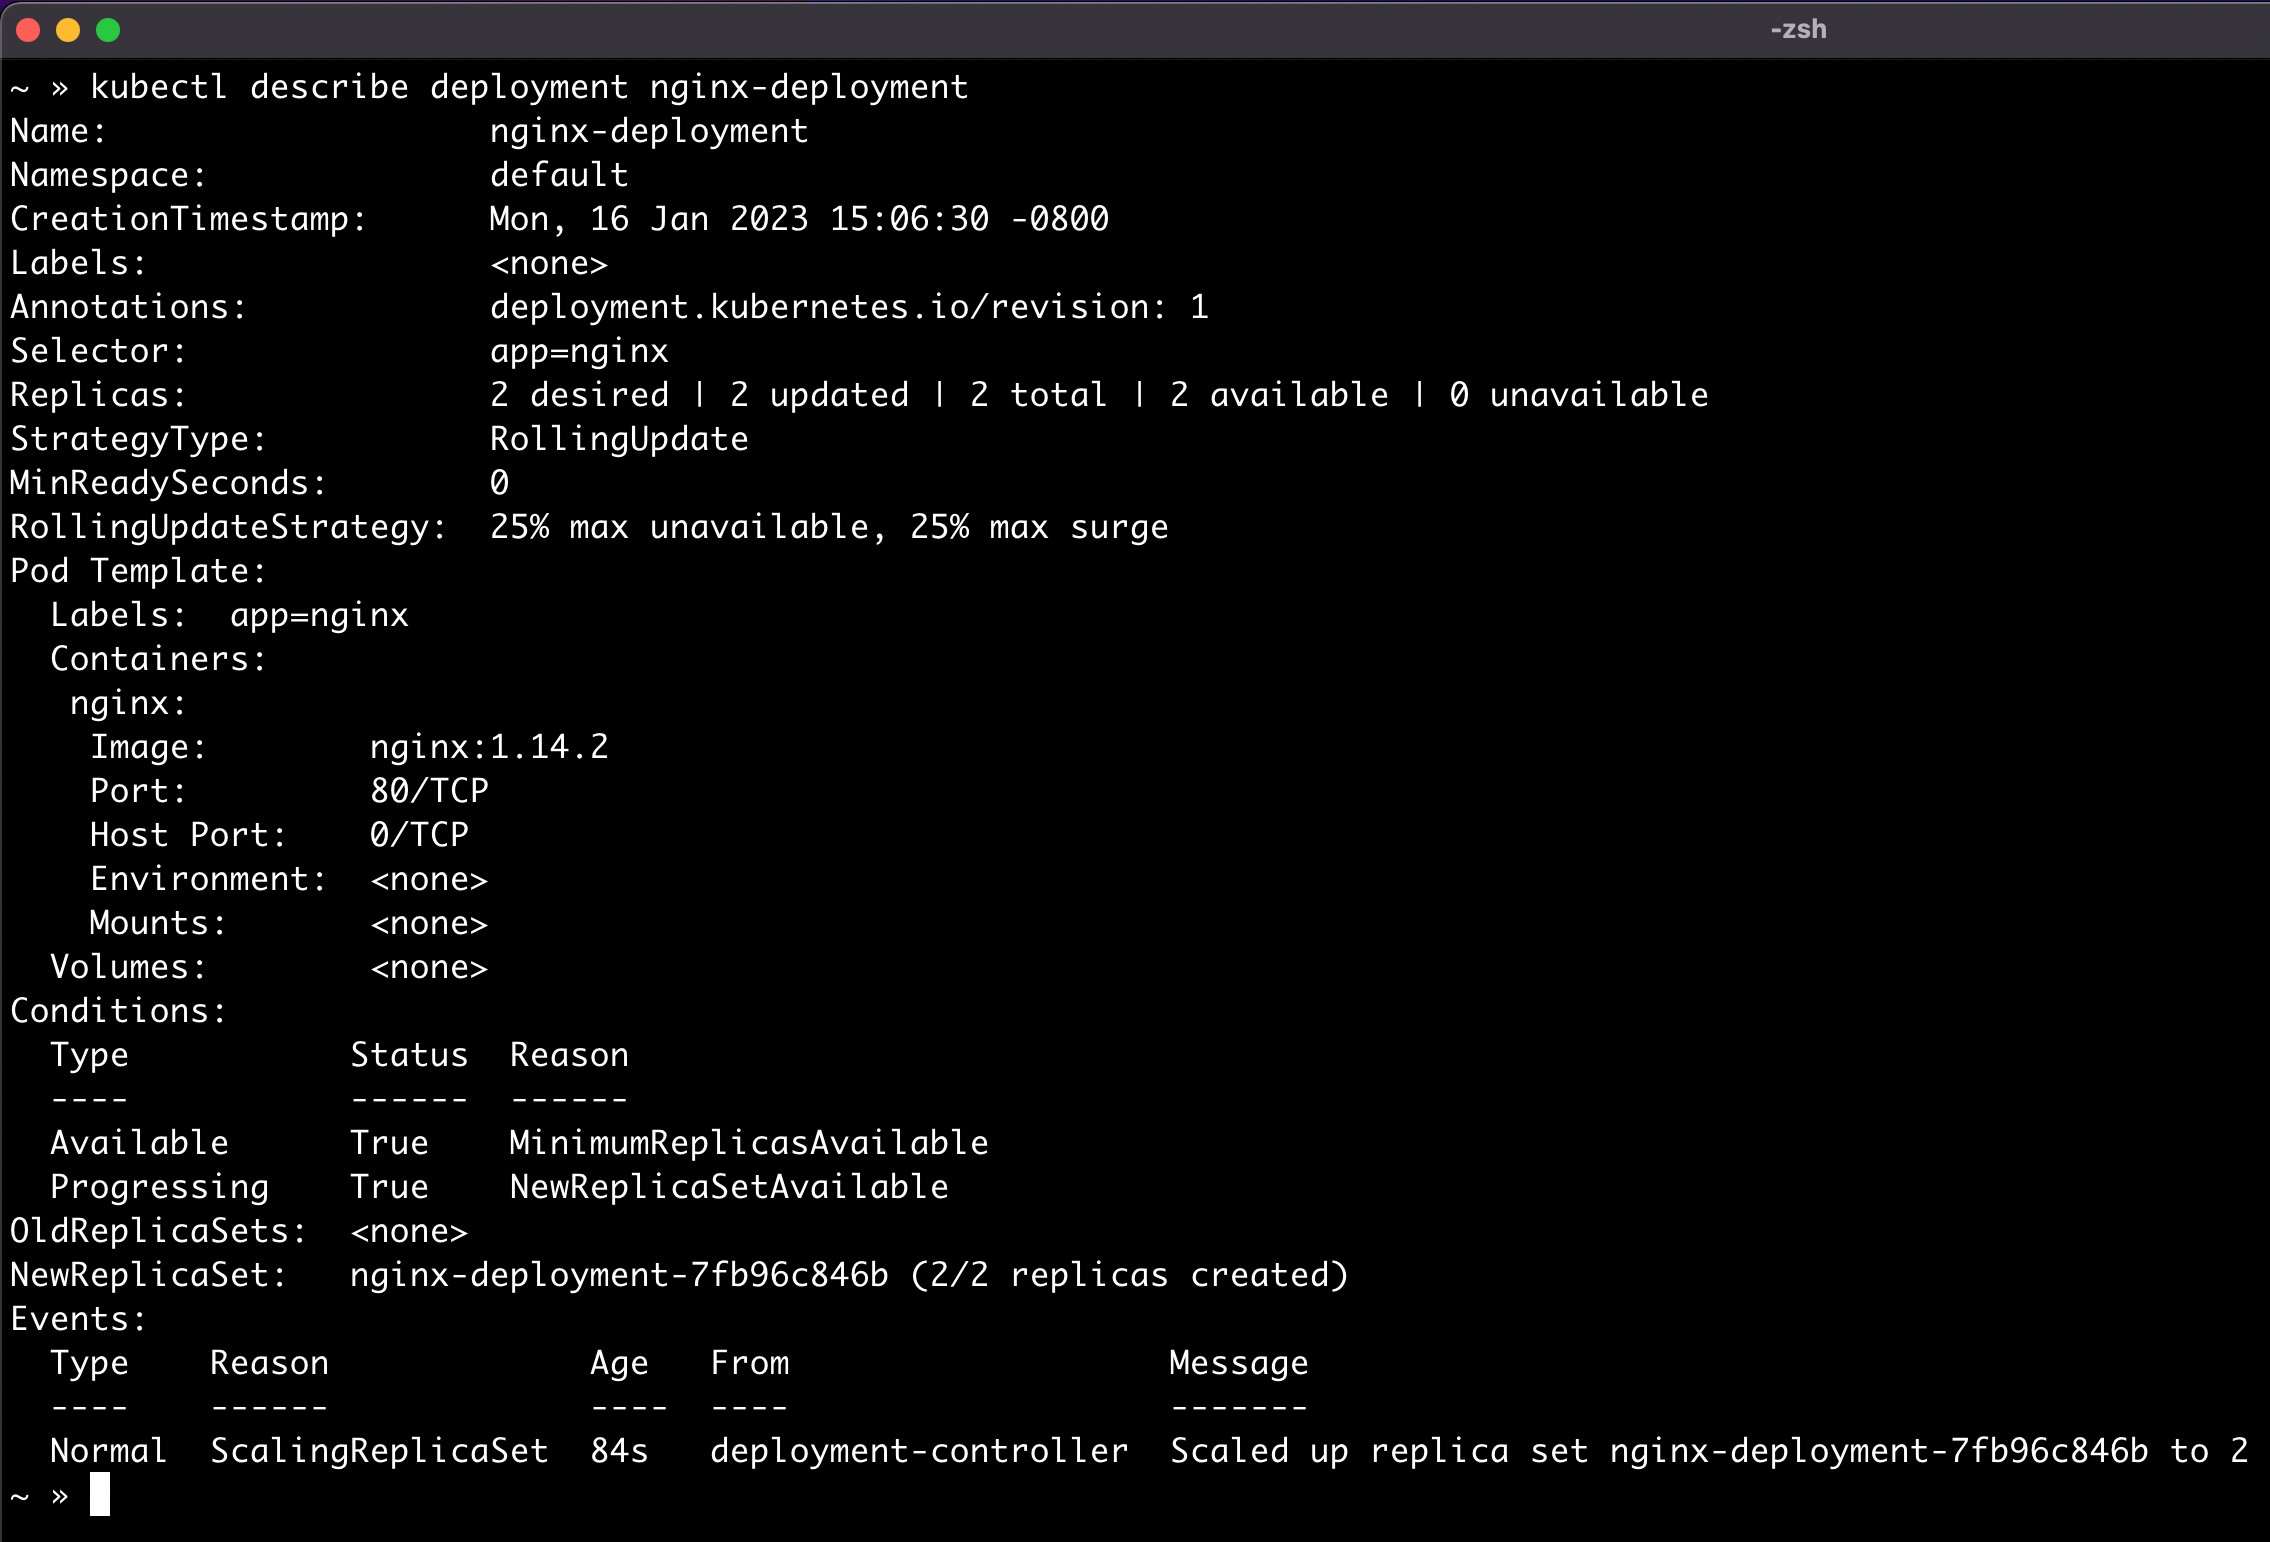
Run this command to create a sample Nginx deployment in the local Kubernetes cluster started by minikube.
$ kubectl create -f https://k8s.io/examples/application/deployment.yaml
What are some of the things you can do with minikube?
Run Kubernetes on a local machine
minikube runs a single-node Kubernetes cluster inside a Virtual Machine or a container, based on the driver you use, on your laptop for users looking to try out Kubernetes or develop with it locally.
Because minikube runs inside a Virtual Machine, it is very portable and can be used on any platform that supports virtualization.
Learn Kubernetes
Since minikube runs locally, you can easily deploy and destroy a cluster.
You can develop different versions of your Kubernetes application on minikube and deploy it as many times as possible without affecting a shared or live cluster.
Overall, minikube is a great tool for anyone who wants to learn about or develop with Kubernetes.
Test applications on a local cluster
minikube can be used to mimic the conditions of a multi-node Kubernetes cluster, making it perfect for testing distributed applications.
You can use minikube to test out your applications and make sure they work before you deploy them to a larger development or a production Kubernetes cluster.
Evaluate the latest release and features on local Kubernetes
You can use minikube to experiment with features in the latest Kubernetes release.
You can also learn how to use the Kubernetes API.
Use add-ons to make the development process efficient
In addition, minikube comes with a set of built-in add-ons that you can use to extend the functionality of your cluster. These add-ons include minikube dashboard, minikube dns, and minikube ingress. You can use these add-ons to make your development process easier and more efficient.
Use Kubectl with minikube like any other Kubernetes cluster
Once minikube starts it will also configure your kubectl installation to communicate with the new cluster. Once minikube is up and running, you can use kubectl to deploy applications, inspect and manage cluster resources, and view logs.
Getting started with the minikube dashboard
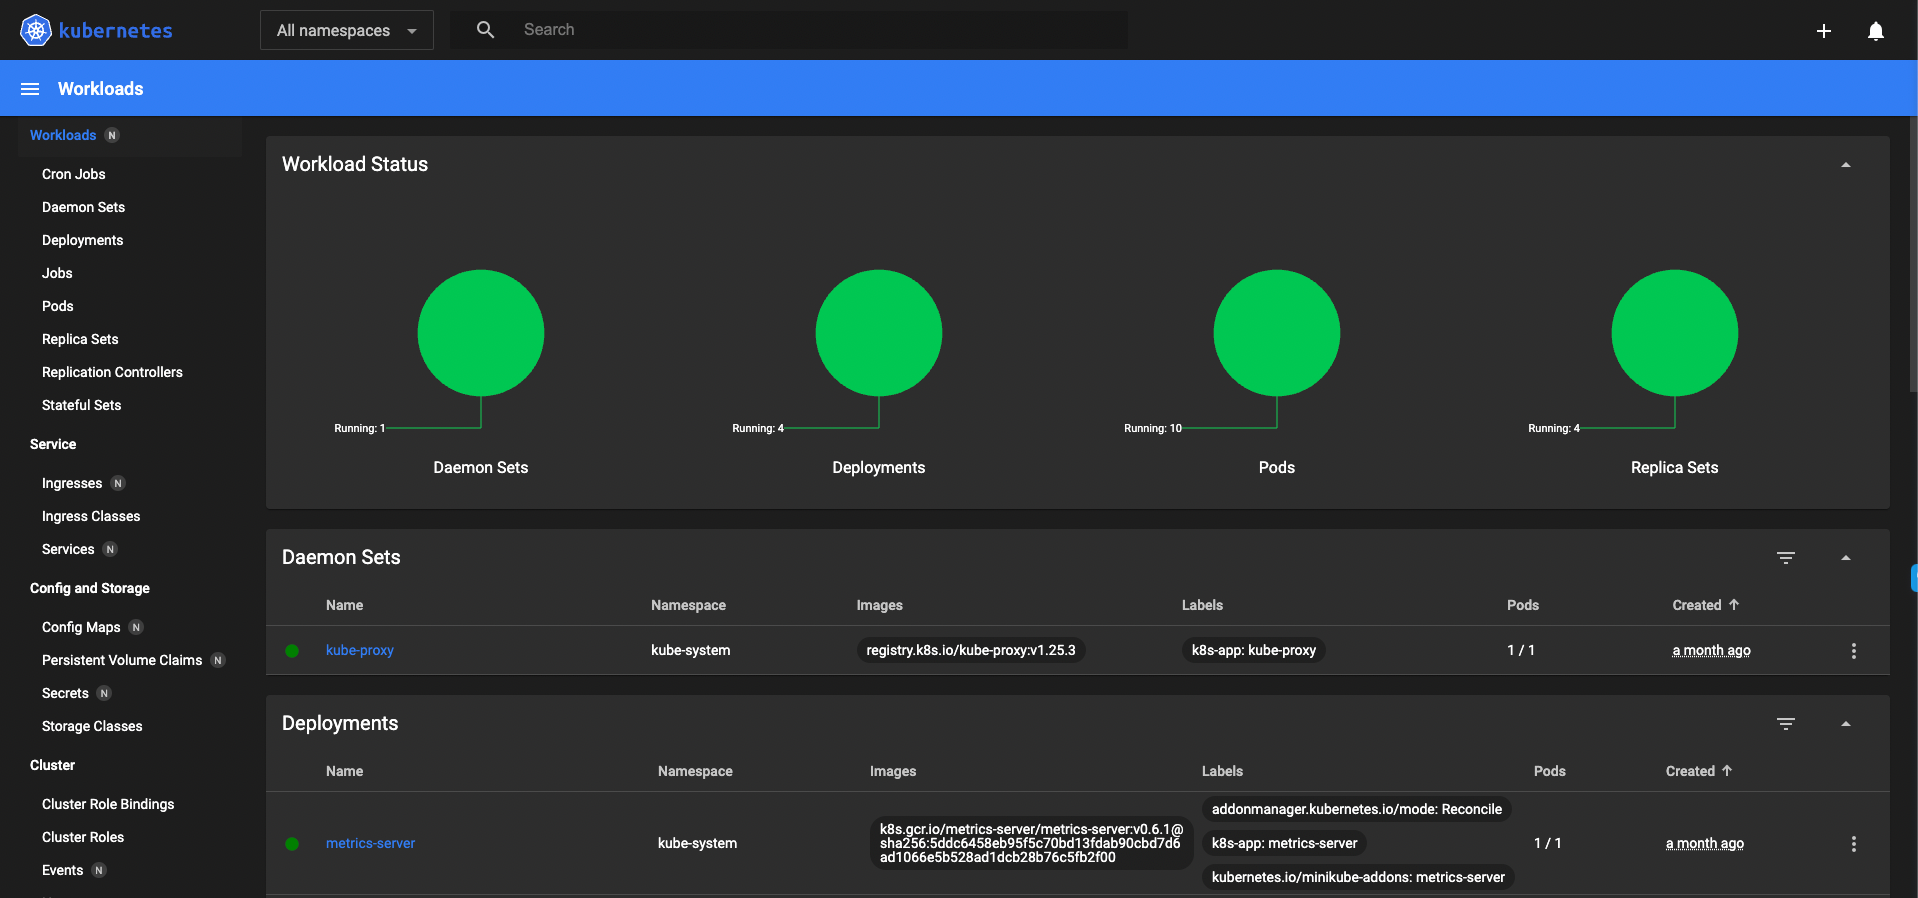
After minikube is installed, you can start the minikube dashboard by running this command from your terminal window.
$ minikube dashboardThis should open a web browser window with minikube's graphical user interface (GUI). It allows you to manage resources, inspect logs and access a variety of features not accessible through the command line. It will show an overview of all running components within your cluster. Using the minikube dashboard, you can easily identify any issues or problems related to your cluster and take appropriate actions accordingly.
Minikube is a great solution for those who want to get started with Kubernetes without the hassle of installing and maintaining a full-fledged cluster. Thanks to minikube, you can get all the benefits of Kubernetes without having to install and maintain a full-fledged cluster.
However, deploying a full-fledged cluster can be daunting and time-consuming. Kubikk makes deploying clusters very easy. You can deploy a cluster in a matter of minutes with its simple and user-friendly design. So if you're looking for an easy way to deploy Kubernetes, look no further than Kubikk. And best of all, it's free to try! Sign Up here.
Comments ()